Note: My online documentation + notes on quickly getting started with Qt, references from ProgrammingKnowledge.
What is Qt?
Qt is a cross-platform application framework for creating graphical user interfaces. You write your code on one machine and compile it to run for any other architecture. It was initially developed by two persons, Haavard Nord and Eirik Chambe in early 90s. In 2008, it was acquired by Nokia and in 2012, by Digia. Google Earth, VLC, Autodesk Maya are some of the companies using Qt.

KDE’s mascot Konqi showing his Qt heart.
Installing Qt Creator IDE
- Go to: https://www.qt.io/download
- Go Open Source > Download
Create your first project
1) Open Qt Creator and click New Project.
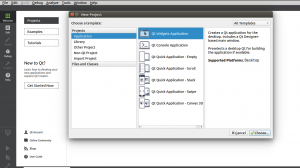
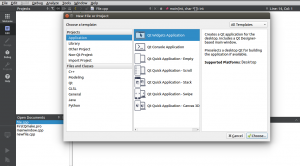
2) Choose Application and then Qt Widgets Application.
3) Name your project.
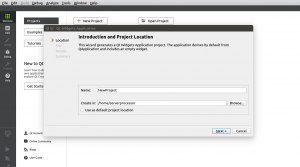
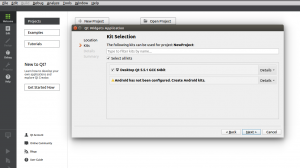
4) Select the default desktop kit which may vary from system to system.
5) Click Next and leave these parameter at default
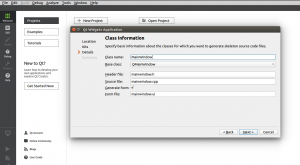
6) Click Finish
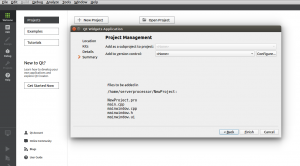
7) Now, you’re going to see something like this.
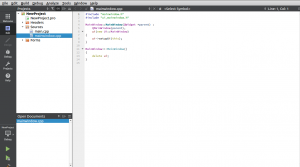
8) Right click your ‘NewProject‘ or the project name given by you and click Build.
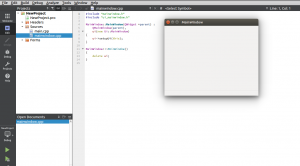
9) Press the green Run button to see the final window.
Empty qmake Project
1) We are going to create an application without any default classes. Go to New Project.
2) Select Other Project > Empty qmake Project
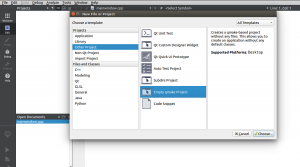
3) Follow the same steps as we did in our first project.
4) It’s going to create a project for you and create a .pro file inside the project which is the project file. It’s just like a makefile for your c++.
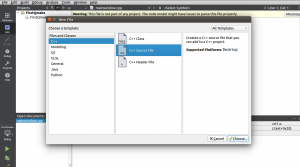
5) Right click you project > Add New…
6) Create a c++ source file > Name the file (Ex- name.cpp)
7) You’ll see that file.cpp ( or your cpp file ) is added to the current project.
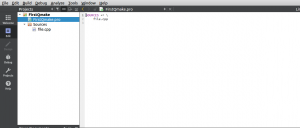
8) Define some fields in .pro file
QT += core gui
greaterThan(QT_MAJOR_VERSION,4) : QT += widgets
SOURCES += \
 file.cpp
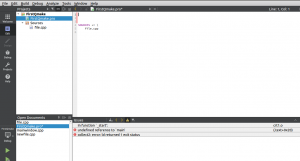
9) Line 1 = core and gui library gets added, Line 2 = We want to use major version greater than 4
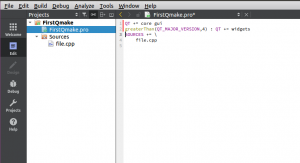
10) Save your project and go to your cpp file (file.cpp in my case).
11) Add the following lines in your code.
#include <QApplication>

int main(int argc, char* argv[])
{
 QApplication app(argc,argv);

 // Whatever you write between line 5 and line 9 will get added to your gui application

 return app.exec();
}
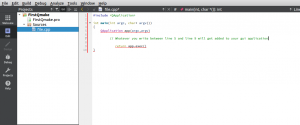
12) Create a HelloWorld Label.
#include <QApplication>
#include <QLabel>

int main(int argc, char* argv[])
{
 QApplication app(argc,argv);

QLabel *label = new QLabel("Hello World!");
 label->show();

return app.exec();
}
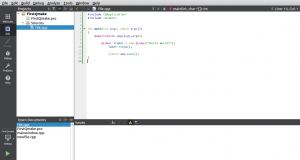
13) Build and Run the code to see Hello World!
14) Set a Window Title with
label-> setWindowTitle("New Title");
15) Set window size with
label-> resize(600,600);
Creating a GUI Application
1) Create a New Project
2) Application > Qt Widgets Application > Follow the similar process as above
3) Go to Forms > mainwindow.ui which is going to look something like this
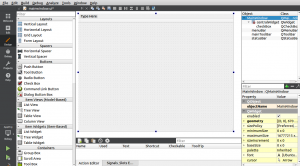
4) Drag and drop a Push Button from the Buttons section.
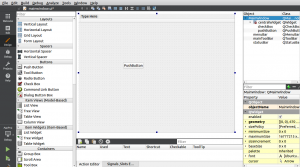
5) You can change the objectName for the PushButton by changing the value of that property at bottom right and press enter (I changed it to PushMe).
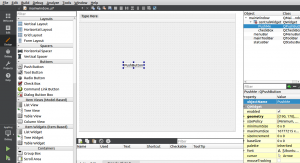
6) Change the text on the PushButton by double clicking the button and entering the text.
7) Build and Run to see this window.
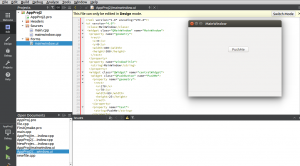
8) Now, lets perform an action once you press the push button. Click Edit Signal/Slots which is the second button on the left hand side of mainwindow.ui text or press F4.
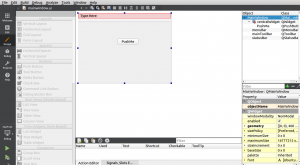
9) Now, click on the push button and drag/move out the mouse to see ground sort of symbol.
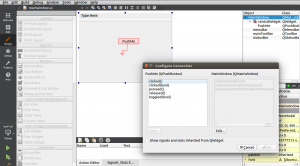
10) Check the box which says Show signals and slots inherited form QWidget and select the appropriate action to perform.
Display some text after button click
1) Create a New Project
2) Application > Qt Widgets Application > Follow the similar process as above
3) Add a push button and a text label in mainwindow.ui
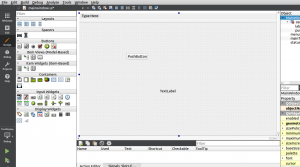
4) Right click on your push button > Select Go to slot… > choose clicked() > Press ok
5) It’s going to create a function in your main window class.
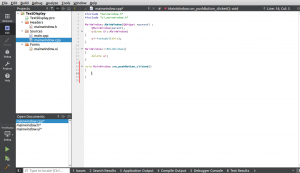
6) Check the object name of the label in mainwindow.ui which is label in my case.
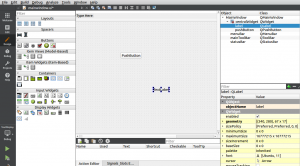
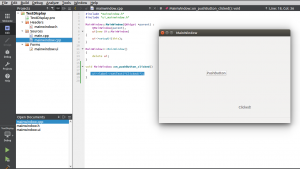
7) Enter the following text inside the on_pushButton_clicked()
ui->label->setText("Clicked!");
8) Build and Run– Now, when you click the button the text changes.
Displaying Messages
1) Create a New Project
2) Application > Qt Widgets Application > Follow the similar process as above
3) Go to mainwindow.ui > Drag and drop a push button
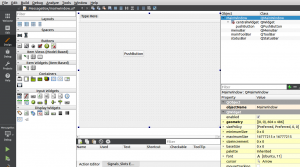
4) Right click push button > Go to slot… > choose the clicked() option > Press ok which will redirect you to the clicked function.
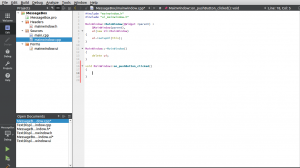
5) Add the MessageBox library.
#include "QMessageBox"
In the on_push Button_clicked() function, add
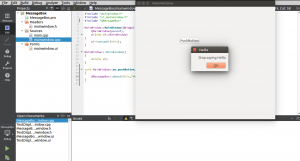
QMessageBox::about(this,"Hello!","Stop saying Hello!")
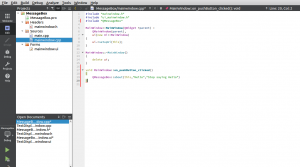
6) Build and Run to see the following output.
Yes/No Quit Application
1) Follow the exact above steps and edit the code in the following manner.
#include "mainwindow.h"
#include "ui_mainwindow.h"
#include "QMessageBox"
#include <QDebug>

MainWindow::MainWindow(QWidget *parent) :
 QMainWindow(parent),
 ui(new Ui::MainWindow)
{
 ui->setupUi(this);
}

MainWindow::~MainWindow()
{
 delete ui;
}

void MainWindow::on_pushButton_clicked()
{

QMessageBox::StandardButton reply = QMessageBox::question(this,"Hello", "Please, no hello!",QMessageBox::Yes | QMessageBox::No);
 if(reply == QMessageBox::Yes) {
 QApplication::quit();
 } else {
 qDebug() << "No is clicked";
 }
}
Spacers and Tabs
1) Create a New Project
2) Application > Qt Widgets Application > Follow the similar process as above
3) Go to mainwindow.ui > Drag and drop a label and line layout
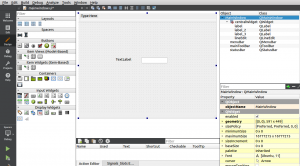
4) Select both the objects and arrange them in horizontal order in the menu above or ctrl+L.
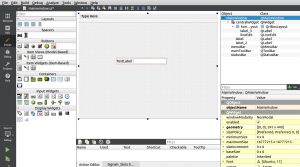
5) Add two more push buttons and make it look like the following image
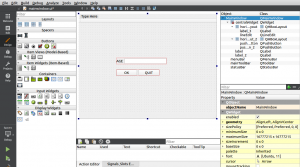
6) Select all of them and arrange in vertical order
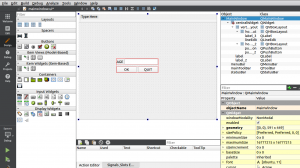
7) Use the horizontal spacer by dragging and dropping it on the left hand side of the OK button to give some space.
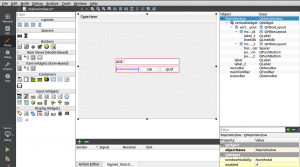
8) Drag and drop three push buttons and apply vertical layout.
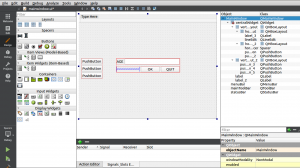
9) Select all > right click > Lay out > Lay Out Horizontally in Splitter
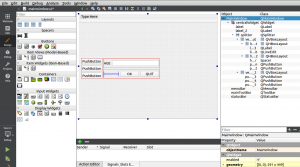
10) Right click anywhere on the working area (not the objects) > Lay out > Lay Out Horizontally
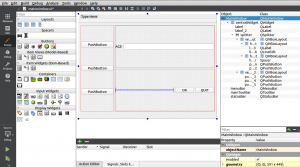
11) Build and Run.
New Window from MainWindow
1) Create a New Project
2) Application > Qt Widgets Application > Follow the similar process as above
3) Right click on your project > Add New… > Qt > Qt Designer Form Class > Next > Dialog without Buttons because we need to create a Qt designer form.
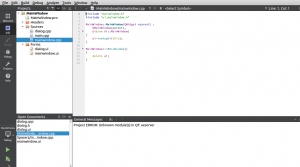
4) Go to mainwindow.ui > Add a push button; Whenever you press the button, you want to open the new dialog.
5) Right click the button > Go to slot… > clicked() which opens up the code
6) Include secdialog in the code
#include "dialog.h" // see the header file
7) Add the following lines on_pushButton_clicked()
 Dialog hello;  // should be as per your class name
 hello.setModal(true);
 hello.exec();
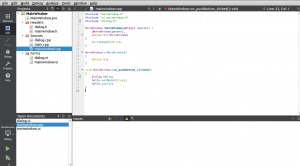
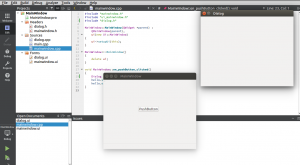
8) Build and Run
Login
1) Create a New Project
2) Application > Qt Widgets Application > Follow the similar process as above
3) Open mainwindow.ui > Drag and drop a group box > change the title to Login
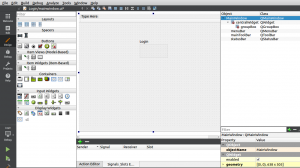
4) Drag and drop two labels and two line edits and change the label names to username and password.
5) Add a push button to verify username and password after entry.
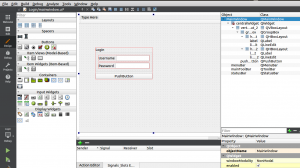
6) Right click push button > Go to slot… > clicked() and include the QMessageBox library
#include <QMessageBox>
7) Inside the on_pushButton_clicked(), enter the following
QString username = ui-> lineEdit->text();
 QString password = ui-> lineEdit_2->text();

if(username== "Hello" && password == "NoHello")

{
 QMessageBox::information(this,"Login","Correct");
 }
 else
 {
 QMessageBox::information(this,"Login","Incorrect");
 }
8) Build and Run
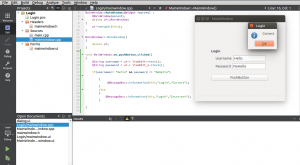
Displaying Images
1) Create a New Project
2) Application > Qt Widgets Application > Follow the similar process as above
3) Open mainwindow.ui > Drag and drop a label >Remove the text inside it > Go to Edit > Sources > mainwindow.cpp
4) Remove the existing lines and paste the following (this code also includes the previous pushbutton code so you might want to remove it)
#include "mainwindow.h"
#include "ui_mainwindow.h"
#include "dialog.h"
#include "QPixmap"

MainWindow::MainWindow(QWidget *parent) :
 QMainWindow(parent),
 ui(new Ui::MainWindow)
{
 ui->setupUi(this);
 QPixmap pix("/home/serverprocessor/Pictures/a.png"); // copy the path of your image
 ui->label->setPixmap(pix.scaled(100,100,Qt::KeepAspectRatio));
}

MainWindow::~MainWindow()
{
 delete ui;
}

void MainWindow::on_pushButton_clicked()
{
 Dialog hello;
 hello.setModal(true);
 hello.exec();
}
5) Build and Run to see the image resized.
Action, Menu, Toolbar
1) Create a New Project
2) Application > Qt Widgets Application > Follow the similar process as above
3) Open mainwindow.ui > go to Type Here at the top
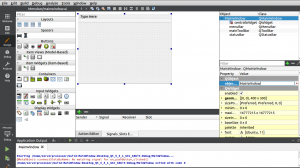
4) Enter File > Press Enter > Write New > Press Enter > Write Open > Press Enter > Write Exit > Press Enter which adds menu items to your menu bar. You’ll notice some actions created for New, Open and Exit at the bottom.
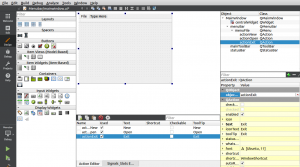
5) Go to Edit > Right click your project > Add New… > Qt > Qt Resource File > Name it Resource > Finish
6) Open resource.qrc > Add > Add Prefix > Name it /rec > Go to Add > Add Files > Add the images
7) Now, go to mainwindow.ui > Double click any menu item > Choose File… > Choose the image
Final Comments
Thank you for visiting the website. In case of any doubt , feel free to contact me.
Saumitra Kapoor


