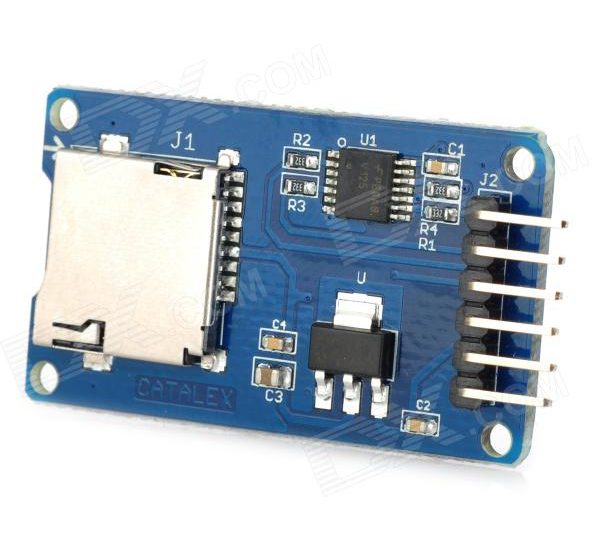
This post is about how to use the Micro SD Card Reader with the Arduino. This will allow you to store the relevant data into a Micro SD Card. We’ll also be discussing how a Micro SD Card works.
Micro SD Card

Micro SD Cards or Secure Digital works on Flash Memory ( Click here to learn about Flash Memory ) to store information. Most of the projects collect important data which needs to be stored for future references. You will also find an SD Card Slot on the Ethernet Modules. If you file away the back side of an SD Card, you will clearly see the circuits running on the chip. Inside every SD Card, rows of tiny memory chips are at work- storing all your documents, photos and more.

Internal Working

A Micro SD Card contains 8 golden colored layers ( Starting from left ). I’ll explain what is the significance of each one of them :
- Pin 1 – NC : Not Connected.
- Pin 2 – CS : CS stands for Chip / Slave Select which is the name of a control line used to select one chip out of several connected to the same computer bus. Let us go into detail to understand it better.
Serial Peripheral Interface ( SPI )
It is an interface bus used to send data between micro controllers and peripheral devices such as sensors or in this case SD cards. It uses separate clock and data lines along a select line to choose the device you wish to talk to.

As you can see, there are three separate lines for Chip Select for talking to a particular device ( SS is Chip Select ). Whichever Chip Select pin will be in the active state, only that Slave will respond to the Master. The SPI Master is responsible for generating clock. Ignore the other pins like SCLK, MOSI, MISO, I’ll make a separate tutorial for SPI Protocol. The only thing which you should look at are the different lines for Chip Select and how one of them is turned “active” for communication. Note that the Slaves cannot talk to each other.
- Pin 3 – DI : Stands for Master Out / Slave In ( MOSI as you can see above). Now, SPI is Synchronous which means that the Clock Signal ( used to synchronize different parts of circuit ) is in sync with the Data Signal. It is the output from the Master. The Master may send a bit on the MOSI line and the Slave reads it.
- Pin 4 – VDD : Is simply the supply voltage.
- Pin 5 – CLK : Is the Clock Signal which is continuous sync with the Data Signal.

- Pin 6 – VSS : Is supply voltage ground.
- Pin 7 – DO : Is Master Out / Slave In ( MISO ) which is the output from the Slave to the Master. Now, the Slave might send a bit on the MISO line and the Master reads it. This architecture allows Full Duplex Transmission which is nothing but transmission in both lines simultaneously.
- Pin 8 – RSV : Reserved. I don’t know its specific use. Please let me know if someone knows it.
Now that we know how a Micro SD Card works, let us use it with a Micro SD Receiver.
Micro SD Receiver
A Micro SD Receiver allows you to interface your Micro SD with the Arduino.
Parts Required
Pin Wiring
SD Card Receiver Arduino
    MOSI                    11
    MISO                    12
    CLK                     13
    SS                      10
Libraries
Make sure you have the SPI Library and Download the SD Library from here
Code
#include <SPI.h> // Header SPI Library
#include <SD.h> // Header SD Library

const int chipselect = 10; // Chip Select Pin

void setup()
 {
   Serial.begin(9600); // Baud Rate = 9600
   while(!Serial) // Wait for the Serial Port to connect
    {
      ;
    }

Serial.print("Initializing SD Card. . .");

if(!SD.begin(chipselect)) // Check if the card is initialized
  {
    Serial.println(" Car Failed or Not Present ");
    return;
  }

Serial.println("Card Initialized");

 }

void loop()
  {
    File dataFile = SD.open("data.txt",FILE_WRITE); // Open the .txt file

    if(dataFile)
      {
        dataFile.println( ---- ); // Write from any relevant sensor or device you wish to
        dataFile.close(); // Only one file can be opened at a time, so close the existing one
      }

    else
      {
        Serial.println(" Life is hard and full of errors! "); // If the file is not open
      }

}
Final Thoughts
The SD Card Receiver Module is a great way to store all the relevant data you collect from a sensor and review it later. The same can be integrated with the Ethernet Module. Meanwhile, let me know what you did with this module and if you face any difficulty using it, feel free to ask it. Thank you so much for your support.


