In this tutorial, we will be using a PIR Motion Sensor and a NodeMCU to send a custom tweet when you wave your hand. I have already made a tutorial on PIR Motion Sensors to refer to : PIR Motion. Without any delay, lets jump in!
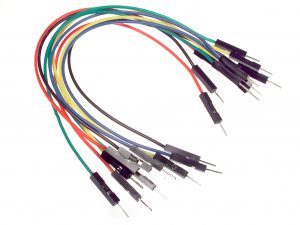
Things Required



Creating an account on ThingSpeak
ThingSpeak is an IOT platform that lets you collect and store sensor data in the cloud and develop IOT applications. The platform provides apps that lets you analyze and visualize your data in MATLAB, and then act on the data. Sensor data can be sent to ThingSpeak from Arduino, RaspberryPi and other hardware.
- Visit : https://thingspeak.com/

- Go to Sign Up and create an account.
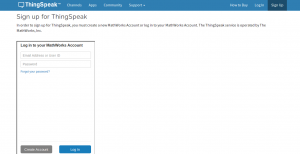
- Login and go to “Apps”
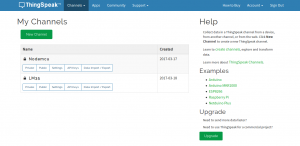
- Open “ThingTweet”

- Note down the API key and link your Twitter account.
What is NodeMCU ?
NodeMCU is an open source IOT platform and includes a firmware which runs on ESP8266 Wi-Fi SoC. It’s a module widely used as IoT gateway. One way to program this device is Lua scripting language and the second is via Arduino IDE. We are gonna go ahead with the second approach.
Programming NodeMCU from Arduino IDE
- Download Arduino IDE from Arduino.cc

- Enter http://arduino.esp8266.com/stable/package_esp8266com_index.json into the “Additional Board Manager” URL field in the preferences section.

- Use the Board manager to install ESP8266 package : esp8266 by ESP8266 Community

Settings for the Board
- Select the board – NodeMCU 1.0 (ESP 12e Module)
- CPU Frequency – 80MHz
- Flash Size – 4M (3M SPIFFS)
- Upload speed – 115200 ( I guess the 9600 mentioned on the board is for Lua scripting)
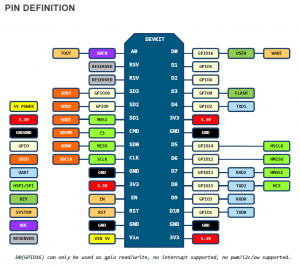
Pin Wiring
Sensor Pin NodeMCU
    GND                      GND
    VCC                      3V
    OUT                      D4
Connections

Arduino Code
#include <ESP8266WiFi.h>
#include <WiFiClient.h>
#include <WiFiServer.h>
#include <WiFiUdp.h>

int led= 13;
int sensepin= 2; // D4 is GPIO2
int state=LOW; // Assuming No motion initally
int value= 0; // Variable which stores status of the sensor

String API = "XXXXXXXX"; // Enter your ThingSpeak API


// Enter your ssid and password
const char* ssid = "XXXXX"; // SSID (Service Set Identifier) is the name of the WiFi network you want to connect to
const char* password = "******";

WiFiClient client;

void setup()
 {
    pinMode(sensepin, INPUT);

    pinMode(led,OUTPUT);

    WiFi.begin(ssid, password); // Initializes the WiFi library's network settings and provides the current status


    // allow time to make connection
    while (WiFi.status() != WL_CONNECTED) // WiFi.begin returns WL_CONNECTED when connected to a network. We are basically waiting for the connection.
    delay(500);

    value= digitalRead(sensepin); // Read PIR value
    if( value == HIGH )
     {
      digitalWrite(led, HIGH); // Turn LED on
      delay(100); // Delay of 100 milliseconds

       if( state == LOW)
         {

            String tweet = "Motion-Detected!";

        if (client.connect("184.106.153.149", 80)) // Connects to a specified IP address and port
           {
              client.print("GET /apps/thingtweet/1/statuses/update?key=" + API + "&status=" + tweet + " HTTP/1.1\r\n");
              client.print("Host: api.thingspeak.com\r\n");
              client.print("Accept: */*\r\n");
              client.print("User-Agent: Mozilla/4.0 (compatible; esp8266 Lua; Windows NT 5.1)\r\n");
              client.print("\r\n");
            }
         }

      }
 }

void loop()
{

}
Output
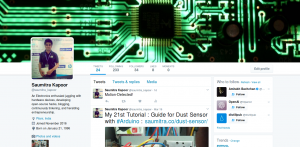
Wave your hand to see this ( Make sure that your Twitter account is authorized from ThingSpeak )
Final Thoughts
Thank you for visiting the website. In case of any doubt, feel free to ask.


Hi,
Thank you for this easy tutorial. This was my first and only tweet successful, meaning it worked once, received my tweet and from there I could not tweet again when taking pin 2/D4 low. Now easy became a frustration.
I am using the Thing Tweet API key in top of arduino sketch? Account is linked.
I regenerated the thing tweet API key too.
I have changed nothing else.
Worked once, got the tweet.
Now nothing.
May be I am not aware of limitations either by Thingspeak or twitter account ?
Any advice please, would like to master this tutorial of yours.